Teaching Showcase: Exploring Interaction and Evaluation through Game Design
When I was working at Bauhaus-Universität Weimar in 2015/16, I planned and taught this full-semester project course. Its goal was to familiarize the participants with the principles of evaluation methods for human-computer interaction through a process of designing, implementing and evaluating a video game.
Context
BUW has several master’s degree programmes that are thematically adjacent to human-computer interaction, and they share many courses. One course that every student in one of these master’s programmes needs to complete is a student project. In a student project, participants come together as a small group of typically 5 or 6 students to put the theoretical expertise they have acquired in prior courses into practice. Different projects have varying focuses on analytical vs. constructive components, but they all require the students to define their own realistic goals (within a thematic framework provided by the project advisor) and work towards them.
In the winter semester of 2015/16, I offered this project as a one-time opportunity to explore game design as a context where HCI evaluation methods can be used.
The basic idea for the project course was to apply the HCI evaluation methods that the students already knew from prior courses (interviews, questionnaires, surveys, etc.) to a context where they had no prior experience: the creation of a video game. The project group would be tasked with learning the basics of game design, and would then be prompted to devise and prototype a game of their own, with the added challenge that it had to implement some sort of novel or interesting idea for user input instead of just a standard game controller or mouse and keyboard. When this game was in a playable state, the project group’s task would be to conduct a scientific evaluation using established methods of their choice. I planned the details of the course with this concept in mind.
The different project courses were advertised to students at the yearly project fair. I presented the course and its thematic focus with the help of a few slides.
Because students have many different project courses to choose from, I was able to assume at least some intrinsic motivation for my specific topic. Nonetheless, the course had to be designed in such a way that students with little to no experience with video games would be able to complete it. In addition, I considered it important to revisit the evaluation methods that the participants already knew from the perspective of a game designer, and to refer to relevant literature from the field of game studies and from the game development industry to help the team apply their knowledge.
Semester Plan
Before the start of the project course, I developed a week-by-week plan to set topical goals throughout the semester. This would serve as a guidepost for myself as well as for the students.
| Analytical | Constructive | |
|---|---|---|
| W1 (Oct 12) | n/a (Because the project fair happened later this week, the course would start in week 2.) | |
| W2 (Oct 19) | Initial meeting + thematic appetizer, discuss goals and expectations and preexisting knowledge | |
| W3 (Oct 26) | Methods overview | Let’s talk about game input and technology |
| W4 (Nov 2) | Focus groups | Brainstorming and collecting ideas |
| W5 (Nov 9) | Heuristic evaluation | Prototyping |
| W6 (Nov 16) | Questionnaires and surveys | Game loops and core systems |
| W7 (Nov 23) | Interviews | Programming challenges in games + working on your game |
| W8 (Nov 30) | Observational studies | Working on your game |
| W9 (Dec 7) | Gameplay metrics | Working on your game |
| W10 (Dec 14) | Methods summary | Working on your game |
| Christmas break | ||
| W11 (Jan 4) | Working on your game + planning the evaluation | |
| W12 (Jan 11) | Working on your game + preparing the evaluation | |
| W13 (Jan 18) | Conducting the evaluation | |
| W14 (Jan 25) | Discussing evaluation results, lessons learned | |
On the analytical track, each week until christmas there would be a literature review and a discussion on a particular empirical method and how it could be applied to games research. On the constructive track, the project would start with some general input on game creation and then smoothly move into the phase where the project team would create their own game by taking it from ideation through physical prototyping into a software implementation.
For the discussions on evaluation methods, one person from the team would be designated as the “expert” and would be given two or three relevant academic articles by me, whereas everyone else would read just one article for that week. The expert would then be tasked with guiding the discussion and making sure that all important aspects would get covered. There are a number of teaching methods that call for something like designated experts, but I decided to come up with my own set of guidelines and called the concept semi-structured discussion.
On the constructive track, the sessions would start with getting the participants into a creative mindset. To let them experience that ideas for games can be plentiful with the right prompting once you get into it, I created the Game Idea Game, which is now available for download on a separate area of my website.
In the typical game design process, lots and lots of ideas are created, iterated, improved, sometimes fleshed out and developed, sometimes discarded. When searching for that next brilliant game concept, it can be very useful to get a few people together for a brainstorming session and just start pumping out ideas and talking about them. Coming up with a wide variety of game ideas is a skill that does not come naturally to everyone, but it is something that can be practiced and trained.
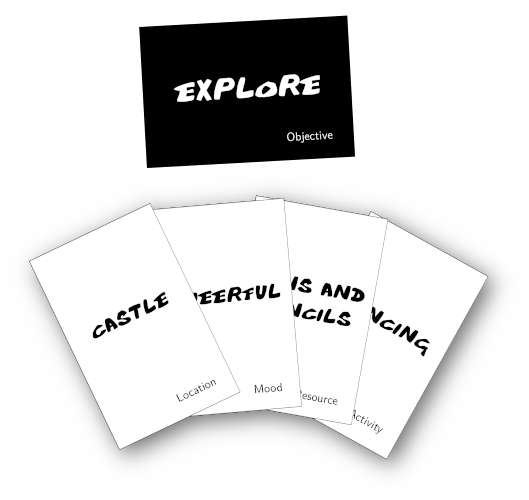
This set of cards was developed to give aspiring game designers those initial sparks. Staring at a blank page can be daunting, so the cards give keywords from various categories that can foster and steer creativity, to be used in any way that gets the ideas flowing.
Print the card collection on A4 paper (or larger if you want bigger cards) and cut along the lines. Glue to colored cardboard for extra sturdiness.
Suggested gameplay: Shuffle objective cards seperately, shuffle all white cards in a big pile. Each player draws six white cards and keeps them on hand. Starting with the most experienced player and then going clockwise, each turn the current player flips over an objective card and adds three cards from their hand to it. They then have 30 seconds to explain a game concept that incorporates all those elements. They may add as many cards from their hand as they can incorporate into the idea. Afterwards they draw two new white cards from the pile. If they cannot come up with an idea at all, they have to take the three cards plus one from the pile back on their hand. The first player to completely clear out all cards on hand during their turn wins the game.
Reminder: Above all, this is a creativity tool. If something about this doesn’t work or isn’t fun, change it! Add or remove any cards you want, change the rules to be less competitive (or more competitive), just do whatever works for you and have fun!
For the physical prototyping stage, I prepared a collection of classic board games and a few mixed sets of Lego bricks. This would allow the team to visualize and “tangible-ize” their ideas. Getting computer scientists to warm up to the idea of physical prototyping can be a challenge, but I also knew from previous experience how worthwhile it could be.
I drew the necessary literature support for the constructive part of the project mostly from Tracy Fullerton’s Game Design Workshop: A Playcentric Approach to Creating Innovative Games, an excellent book that covered all required bases.
Challenges Along the Way and Final Results
Of course a good plan is still only half the battle, so in this section I will recount some of the challenges encountered by the students along with my judgment on how each one would have influenced future iterations of this project.
Turning an Idea into a Prototype
Part of the team’s goals for this project was to do something innovative with input controls. Using a regular game controller would not have satisfied the requirements, they had to come up with some novel interaction concept. The one that they decided on was to use a water bottle containing a small floating ship as a controller to match the game, which would also be about a boat traveling across treacherous oceans. The motions of the water bottle would then be mirrored in the game.
The students did not have much experience dealing with sensors, and hardware engineering is not a field where I had a lot of experience beyond basic soldering either. Fortunately several of my colleagues at the Bauhaus-Universität were well-versed in hardware prototyping and I was able to invite experts to discuss the viability of different input engineering approaches, materials, and form factors. This was a valuable addition to the project and brought added lessons for the participants. Even without easy access to a maker space type laboratory and the associated parts and materials, I would incorporate an added challenge like this into similar projects again, perhaps with the difficulty adjusted to what is practical in the respective environment. Innovative I/O concepts just tend to be so much more interesting from an HCI perspective than off-the-shelf control schemes.
Ultimately they decided to go with the lowest-risk approach and hid a smartphone in the input device, allowing them to read its tilt sensor. To make it possible, they fashioned a socket out of cardboard and applied wood-look veneer to mimick the look of the vintage “ship in a bottle” style.
Collaborative Programming and Version Management
In any given group of students in degree programmes for computer science (or adjacent), there’s bound to be a variety of experience levels regarding programming. The members of this project team ranged from experienced software developers with prior team projects under their belt to almost absolute beginners.
For the constructive part of the project, the task division was left mostly up to the students themselves, so they wisely focused each person on their own strengths. Still, all hands were needed to bring the programming phase to a satisfying conclusion by the deadline. They used a Git repository (teaching each other the basics of version management as necessary) to coordinate progress on the code. I provided guidance on questions about tools and methods, but otherwise let the team manage their own process.
For future iterations of the project, I would consider adding a brief primer on code versioning and team-based software development. In this case the team came out fine on the other end, but a bit more direct support may have alleviated some pressure.
Time Management and Scope Creep
The project plan gave the team a fairly clear time plan for their project, but of course reality never unfolds as expected. My teaching and the book that we used both emphasized the importance of arriving at a playable prototype as early as possible and focusing on the minimum feature set first before spending effort on polish and optional parts. I believe this helped the students to progressively build confidence for their idea and their product.
There were still minor communication breakdowns and ill-placed priorities along the way, but only to an extent that I would deem valuable as a learning experience. Working in a team under a deadline is something that requires practice, and for future projects I would keep the approach of setting a coarse schedule and letting the team define their own interim goals unchanged.
Finding Evaluation Participants
The last big hurdle in the project plan was the usability evaluation / play testing. The team had learned about various different evaluation methods and had then come up with their own evaluation plan. To put it into practice, they needed a suitable number of participants within a short amount of time, which proved to be challenging since most of the students were busy with exam preparation near the end of the semester. Ultimately the number of evaluation participants was lower than expected.
Finding experiment participants, especially without a budget, is often a challenge. In this particular case, from what I could discern there was some bad luck at play, but there are still measures that could have been taken to handle this step more smoothly, such as searching for volunteers earlier in advance. In future projects that take place in a similar semester framework with exams at the end, I would provide advice to that effect.
Project Result: Poseidon’s Trident
A systematic evaluation of the course from the students’ perspective was unfortunately not conducted, but informally I received very positive feedback. The participants noted their improvements in various relevant skills as a result of seeing their project through. They gained insight into academic and practical questions of game design, development, and usability evaluation. In addition, the constructive and trustful atmosphere was pointed out as an enjoyable facet of the project.
The final project result, consisting of the game “Poseidon’s Trident” and its custom input device, is documented here: Student Project: Poseidon’s Trident